Continued from part 1, which gives a general overview and some miscellaneous tips…
My Actual Upgrade Process:
• As noted in part 1, before actually proceeding with any part of the upgrade, I make a complete backup copy of my BBS’s directory. If you’re running in a VM or a containerized copy of Mysitc and you want to be extra paranoid, you can go ahead and take a snapshot. In any case, if anything should go sideways with any part of the upgrade we can always return to where we started.
• I also go ahead and shut down my MIS daemon. It’s possible that you could cause some odd errors or even corrupt some of your data files by making some of these changes while Mystic is actually running. I also have a script I use to automatically restart MIS if it stops running, a relic from back when MIS was fairly unstable, that I terminate while I’m at it.
• I’ve decided to upgrade incrementally, going through the process for each version one at a time, assessing how to proceed with the subsequent upgrade as I complete the last one. The first step I need to complete is upgrading from A38 to A39. Two of our upgrades require using upgrade.exe to modify our binary data structures and I don’t want to risk corrupting my data files by skipping one of these (though I believe upgrade.exe is actually intelligent enough to deal with that these days!)
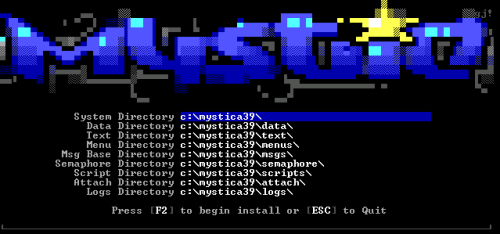
• I’ve gone ahead and downloaded the Mystic v1.12 A39 archive. Once download, I extracted it to a temporary directory (“c:\mtemp112a39”) and then proceeded with the installation, installing it into second temporary directory (“C:\mystica39”.) Note that we’re not going to be running Mystic from here, just plucking the required files from this new installation.
• Now, let’s consult our upgrade.txt instructions:
 .------------------------------------.
 | UPGRADING FROM 1.12 A37/A38 to A39 |-------------------------
 `------------------------------------'

 - Replace existing binaries with the new alpha binaries:

      mystic.exe
      mis.exe
      fidopoll.exe
      mutil.exe
      nodespy.exe
      qwkpoll.exe
      upgrade.exe
      mplc.exe (in scripts directory)
      mide.exe (in scripts directory)

 - Run upgrade.exe once to update your data files then you can
   delete it.

 - Add prompts #528-#537 to the prompt file for all themes you have
   on your BBS.  If you use the default prompts and have not customized,
   then you can simply replace default.txt in the DATA folder with that
   from the fresh installation.  These new prompts can be found below or
   in default.txt in the fresh installation.  See whatsnew for more
   information.

 - Copy over msgsearch.asc from the A39 installation to your TEXT directory
   if you use the default prommpts.

 - Replace "mis_events.ans" in your DATA folder with the newer one
   from the A39 installation

 - Replace "areafixhelp.txt" in your DATA folder with the newer one

 - Replace "filefixhelp.txt" in your DATA folder with the newer one

 - Replace "bulletin.mps" in your SCRIPTS folder with the newer one

 - Replace "onlyonce.mps" in your SCRIPTS folder with the newer one

 - Replace your msg_editor.ini from the text folder with the newer
   one from the A39 installation.  If you use a custom msg_editor.ini then
   you will need to modify "str7" to include the Draft option by adding a
   F at the end of the hotkey list and then adding "D-Save as Draft" into
   the list of options.  Use the default msg_editor.ini to guide you if
   you need help.

 - Recompile MPL programs (mplc -all in SCRIPTS directory)
• So, wow, a lot of steps involved in the A38 to A39 upgrade. Let’s jump right in:
· First, I’ll go ahead and skip down to adding the new strings to my default.txt language file. To do this I simply opened the new default.txt located in C:\mystica39\data, copy the new strings, #528-#537, and paste them into the appropriate place in my default.txt (which, for the record, is right at the end of the file.) You can do this using your text editor of choice. I’m using good old edit.com here strictly for extra street cred. 😉
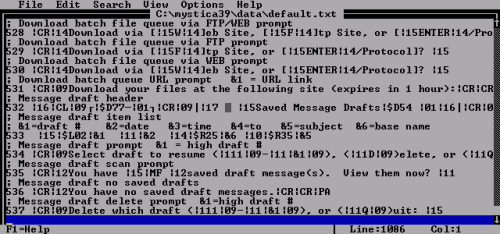
Note that, if you’re planning on using the features related to these new strings, you’ll want to modify these to match the rest of your theme. This can obviously be an involved process, especially if you’ve heavily modified your theme. In the case of Distortion, I usually avoid using a lot of the cool new, modern user-facing features James keeps adding to Mystic, preferring to keep the system feeling more mid 90s era appropriate.
It’s clear from the prompts themselves that they all relate to the new draft message feature mentioned in the upgrade.txt file, which I’m not planning on using, so I’ll just leave these prompts as is. If some of them do end up appearing in my setup they’ll stick out like a sore thumb and I’ll modify them later.
· The next step has us replacing our \text\msgsearch.asc with the updated version. The instructions specifically mention that you should do this if you use an unmodified default.txt file, which tells us that this isn’t a new required template, but an extra display file that is called from a string. Since Distortion’s strings are highly modified, I don’t call that display file, and can skip this step.
· Next we’re asked to replace our \data\mis_events.ans with an updated version. Taking a quick look at the file confirms my suspicion that this is the template for one of MIS’s status screens. Mine are default, so I copy the file over, overwriting the original one.
· The next two steps involve replacing two echomail related help files in our \data directory. These files will almost always be left stock, though if you’ve got a highly modded your system and you happen to be running an echomail network, you may want to confirm that you haven’t customized yours. If you haven’t, just copy the files over, overwriting the old ones. If you have, make the appropriate modifications to your old files to incorporate the new changes, or modify the new files to incorporate your customizations and copy away. In Distortion’s case, it’s the former, so I copy and overwrite.
· The next two steps are to replace two of the stock MPL scripts. If you’re using these scripts in your setup and might have modified them, you’ll need to take a quick look at what has changed and make the appropriate modifications to your old files to incorporate the new changes, or modify the new files to incorporate your customizations and copy away. I’d recommend using some kind of text file compare (or “diff”) tool to speed up the process, though these kinds of changes are usually minor unless specifically noted. In Distortion’s case, I’m not using any of stock MPL scripts, so I skip this step entirely.
· Finally, the last of the potentially tricky steps, replacing \text\msg_editor.ini. Well, I’ve completely customized my message editor, so I certainly don’t want to do that. The instructors tell me instead to simply modify str7 to include the new hotkey and key help. Again, I can tell from the string itself that it relates to the new draft message feature, so I don’t bother.
That said, I also notice that a new string, str18, has shown up. Hmph… it looks like James left that out of the upgrade instructions! Again, its related to drafts, so I don’t need it, but just for the sake of having a complete msg_editor.ini, I go ahead and copy the default str18 from the a39 msg_editor.ini into mine.
· Next, we’re going to go back up to the very first step. We’re going to copy all of the executables from our C:\mystica39 directory (and \scripts subdirectory) to our Mystic installation, overwriting all of the old versions. I also like to copy any of the associated .ini files from the new version if I know my old ones are default. For example, I know my mide.ini is default, so I went ahead and copied it too, just in case there have been any changes to it.
· Now we need to upgrade our data files by running “upgrade.exe”. If you run into any errors during these step you should immediately stop – something very bad has happened. You could try restoring your original directory and going back through the steps, or reverting and leaving your BBS as-is until you can do more troubleshooting. In case of Distortion, everything was successful.
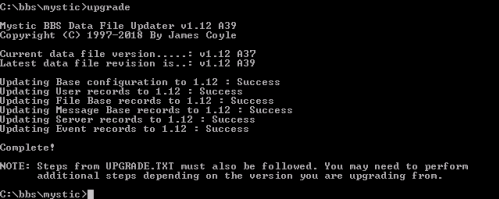
I’d recommend you delete your upgrade.exe after you successfully complete this step. You won’t need it anymore.
· Finally, I go to my \scripts subdirectory and run “mplc -all” to recompile all of my MPL scripts with the new version of MPLC. Again, look for any errors – if you do encounter any, most likely it’ll be due to a change in MPL which will require some (hopefully minor) updates to your scripts. You’ll want pair the error message the compiler gave you with a scan of whatsnew.txt at this point to try to figure out what has changed that could be causing you the error(s). In my case everything compiled without any errors.
· Now that the upgrade is (apparently) complete, we should launch MIS, log on to the BBS, and take a look around. I briefly log into my system via local telnet and give everything a quick once over to make sure nothing looks amiss. I also test my echomail, which I’d highly recommended if you’re on any echomail networks, since that is one area where Mystic has been constantly developing in recent years. Distortion is the hub for a message network, so this is an important step for me.
• At this point we’re done with this version. Distortion is on A39. Woot!?
Still, knowing we’re still several versions behind has to make you wonder if this new version introduced any bugs that subsequent released fixed. Maybe major ones, even. Well, let’s get moving on to A40…
• I’ll start with downloading the Mystic v1.12 A40 archive. Once downloaded, I extract it to a temporary directory (“c:\mtemp112a40”) and then proceed with the installation, installing it into second temporary directory (“C:\mystica40”.) Sound familiar? You bet it does.
• Again, we consult our guiding star, the upgrade.txt file:
.--------------------------------.
 | UPGRADING FROM 1.12 A39 to A40 |-------------------------
 `--------------------------------'

 - Replace existing binaries with the new alpha binaries:

      mystic.exe
      mis.exe
      fidopoll.exe
      mutil.exe
      nodespy.exe
      qwkpoll.exe
      upgrade.exe
      mplc.exe (in scripts directory)
      mide.exe (in scripts directory)

 - If you use default installation replace the default.txt from DATA with the
   newer one, otherwise the following prompts have been modified or changed
   and will need to be updated/added to your custom themes:

     Changed prompts: 18, 419, 420, 463, 486
         New prompts: 538-552

 - Copy "msg_index.ini" from the TEXT folder into your TEXT folders
 - Copy "msg_index.ans" from the TEXT folder into your TEXT folders
 - Copy "msg_index_help.ans" from the TEXT folder into your TEXT folders

 - Copy "cfgroot4.ans" from the DATA folder into your DATA folder

 - Execute upgrade.exe

 - Recompile MPL programs
• Some odd steps, but notably less than last time. Let’s dive right in!
· Again, I’m going to skip copying the binaries for now and move to the next step, which seems to be copying more strings. Again, I simply open the default.txt located in C:\mystica40\data, copy the new strings, #538-#552, and paste them into the appropriate place in my default.txt. Good god, that’s a lot of new prompts. We better take a look at them and make sure we don’t need to spend a while customizing them to fit Distortion’s theme.
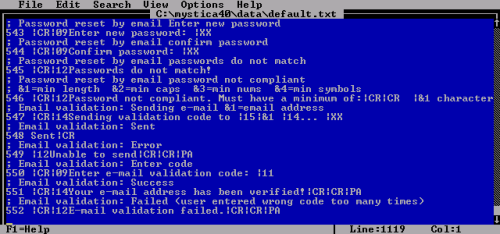
Ah, they all appear to relate to A40’s new reset password via email feature. This is a pretty neat feature, one I’d achieved in earlier setups with mods, but not something I intend on adding to Distortion quite yet. As with last time, I’ll leave the strings default and if they should appear somewhere I’ll spot them right away and come back and take care of them.
But wait… that’s not all! We also need to modify some existing strings. If you’re running a stock standard default.txt, you can just copy them over, but for the rest of us we need to roll up our sleeves and take a closer look.
I open default.txt from my Mystic installation and the one from my A40 temporary installation and compare each of the strings listed:
Prompt #18 in my installation is an error for when new users specify a password that is too short.
Prompt #419 is my user config editor password prompt.
Prompt #420 is an error for when the user specifies a short password in the user config editor.
Prompt #463 is the prompt for when editing a message subject in the FSE, which I assume has been replaced by prompts in msg_editor.ini.
Prompt #486 is a message quick scanning prompt.
Let’s consult the oracle (whatsnew.txt) about this:
+ Mystic now has a password policy in System Configuration where the minimum
   password length can be set along with number of required capital letters,
   numbers, and symbols.  It is highly recommended that the minimum password
   length is set to at least 7 characters.  Some default prompts have been
   updated to support this new feature: 18, 419, 420. If you have custom
   themes, you should take a look at the new defaults and consider updating
   your custom prompts as well.

+ Mystic will now validate that the user enters a valid e-mail address
   format when prompting for e-mail address during new user application and
   when editing user information.  Two new prompts have been added that will
   be displayed when they enter an invalid e-mail address: #463, #486.  You
   should update your prompts based on the new defaults.
Well, #18 and #420 will need to change to match my modifications and still be accurate, so I modify those using the new default.txt strings as a guide. #419 doesn’t need to change. Since I’m not using email functions on Distortion as of yet, I went ahead and copied of the new A40 strings for #463 and #486 for now, overwriting what i had..
· Next we need to copy a few msg_index related files from our \text subdirectory. According to whatsnew.txt this relates to a new light bar message area lister. Since I don’t use this feature (again, Distortion forgoes many of the newer Mystic features to stick with the traditional ones) I’ll go ahead and copy them over, but I won’t worry about modifying them.
+ New menu command: M! This is a rewrite of the message area index reader
   rebuilt to work identically to the file base index lister.  See the
   msg_index.ini file for more details.  Command line option is the template
   name or default to msg_index.ini if none is specified.  I am not removing
   the old one just yet so that people have time to adapt to the new version
   and to test it for issues, but please note the old one will likely be
   replaced by this new one eventually once the features are all done and
   tested.
· We’re asked to copy \data\cfgroot4.ans to our \data subdirectory. Taking a peak at the file shows that this is yet another template for one of MIS’s status screens. As mine are default, I copy the file over without any need to modify it.
· Back up to the very first step to copy all of the executables from our C:\mystica40 directory (and \scripts subdirectory) to our Mystic installation, overwriting all of the old versions.
· We then upgrade our data files by running “upgrade.exe” again. Again, if you run into any errors during these step, stop and troubleshoot, restoring to your backup if need be. Everything was fine on Distortion, however, and I delete my upgrade.exe.

· Finally, I go to my \scripts subdirectory and run “mplc -all” to recompile all of my MPL scripts with the A40 version of MPLC.
This time I received a single error referring to a password variable not being found in “apply_sample.mps”. This is a stock script used to demo replacing the application process with an MPS and isn’t something I use on Distortion, and it makes sense that there might have been changes to it given all of 1.12 A40’s numerous password changes. I check the A40 installation and find that \scripts\apply_sample.mps had in fact been updated. This probably should have been mentioned in the upgrade.txt instructions. Oh well. Copying the new one over and re-running “mplc -all” produced no errors. Of course, since I’m not using apply_sample.mps, I could have just deleted it all the same. That said, some of you with highly customized setups might have scripted your application process, using this file as a starting point, so you made need to spend some quality time fixing it to work under A40.
• Again, I briefly log into my system via local telnet and to make sure everything looks good. Our upgrade to A40 seems to be complete. Well, we’ve got momentum now… let’s keep going!
• Once again, we consult the upgrade.txt file:
 .------------------------------------.
 | UPGRADING FROM 1.12 A40-A41 to A42 |-------------------------
 `------------------------------------'

 - Replace existing binaries with the new alpha binaries:

      mystic.exe
      mis.exe
      fidopoll.exe
      mutil.exe
      nodespy.exe
      qwkpoll.exe
      upgrade.exe
      mplc.exe (in scripts directory)
      mide.exe (in scripts directory)
.--------------------------------.
| UPGRADING FROM 1.12 A42 to A43 |-------------------------
`--------------------------------'
- Replace existing binaries with the new alpha binaries:
mystic.exe
mis.exe
fidopoll.exe
mutil.exe
nodespy.exe
qwkpoll.exe
upgrade.exe
mplc.exe (in scripts directory)
mide.exe (in scripts directory)
- Copy userchat.ans and userchat.ini from the TEXT folder into your TEXT
folder• Interestingly, we see that the A40-A43 upgrade steps mostly only include replacing our binaries. I smell an opportunity to leapfrog! We’re skipping directly from A40 to A43!
• I extract the copy of Mystic v1.12 A43 I downloaded originally when reviewing the upgrade instructions to a temporary directory (“c:\mtemp112a43”) and then proceed with the installation, installing it into second temporary directory (“C:\mystica43”.) Yes, this again.
· Starting with the first step, since there aren’t many others this time, we’ll copy all of the executables from our C:\mystica43 directory (and \scripts subdirectory) to our Mystic installation, overwriting all of the old versions.
· Again, I go to my \scripts subdirectory and run “mplc -all” to recompile all of my MPL scripts with the A43 version of MPLC. No problems.
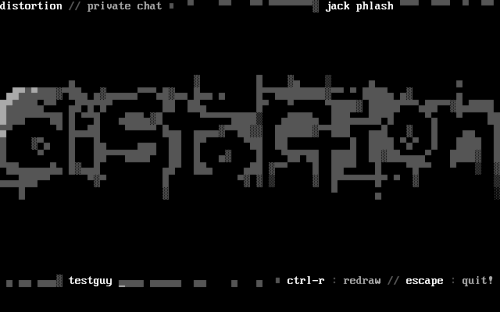
· A43 tells us we need to add a new \text\userchat.ans and \text\userchat.ini, file. Here’s what whatsnew.txt says on the subject:
+ Mystic's private user to user chat system now has a split screen chat
   option.  A new template userchat.ini and userchat.ans are required now to
   be accessible by your theme otherwise your user to user chat will not
   work.  See the default installation for these new files.
I went ahead and did a basic customization of the new screen and ini file to make it make Distortion a little better, thematically. I’m not going to go into a lot of detail right now, but suffice to say that one big benefit the new style of ini file based templates James has been adding lately is that customizing these screens is now incredibly easy and doesn’t require any of the old tricks of the trade, like animating the placement of control codes into the ANSI itself. I simply modify the ANSI template and edit the INI files with update coordinates and strings. Easy!
· While in the whatsnew.txt I notice that a prompt string has changed slightly, despite not being referenced in upgrade.txt:
+ Prompt #464 message quote text now has &4 MCI code which is replaced by
   the time that the original message was written.
This is a great example of why you should always review your whatsnew.txt. In this case, the addition of the time on the message quote header is completely optional and wasn’t available to us before now (read: for years and years) so I have no great urge to modify it. I do, however, copy the description comment for #464 from A43’s default.txt file into my own for future reference.
• With all that, we seem to be done. Now’s the time to give the whole setup one more test. I can already tell from my connection logs that inbound and outbound binkp and inbound telnet connections are all working. Logging into the board, everything appears to be functioning correctly. SUCCESS!
I hope this was helping to someone, somewhere! Stayed tuned for more tutorials of this sort in the future, most of which will likely be covering much more advanced topics.
