Not long after the events of my last update I took the next logical step and obtained a set of Workbench 1.3 disks. For those reading who aren’t Amiga users, Workbench is the graphical interface part of AmigaOS and greatly expands the core functionality found within the so-called Kickstart portion of the operating system. While a great many of Amiga’s games and applications are bootable, for anything else you’ll be booting to Workbench. After a bit of a false start resulting from my disk drive being stone dead (which thankfully simply checking and reseating its cables seemed to correct) I was finally able to begin the process of actually learning how to use an Amiga.
Once in Workbench, I started poking around with the various utilities that make up this relatively early version of AmigaOS. As I aimlessly played, I started to encounter all manner of random issues. Sometimes the whole system would lock up or just restart, other times the caps lock light on the keyboard would come on or flash (which, similar to POST beeps on IBM compatible PCs, is one of a few ways Amigas can communicate hardware errors to the user) often with the keyboard totally unresponsive. Then this started happening at boot, before I’d even got past the Kickstart screen, and even when I got past it into Workbench it would happen within a few minutes, often when attempting to access a disk. I was perplexed, since from what I’d read many of the symptoms I’d experienced seemed to be caused by unrelated component failures. I managed to acquire an Amiga Test Kit 1.15 disk to run its numerous simple tests on things like RAM chips and CIA chip timings which all passed, easing my worries somewhat.

I wondered if my fancy modern switching power supply was the issue, since I knew that the model of Meanwell I’ve got has very different minimum load requirements from the original Amiga 500 power brick, and if I wasn’t hitting that required minimum, it could be running a little out of spec. It seemed logical to guess that a misbehaving power supply could result in all kinds of odd behavior on an older, simpler computer like the Amiga 500, and of course this could easily explain any power loss and restarts I experienced. Still, after researching it more, and without a multimeter handy while catching it in the act, I couldn’t really confirm that this was the issue. I remained highly suspicious, and while this may be coincidence, I was doing most of my testing without my trapdoor memory expansion installed as I had intended to grab some before and after pictures of Workbench displaying my increased memory for my last post, and noted that when I installed it (and later, other, additional accessories) things seemed to stabilize considerably.
At one point near the peak of my paranoia about these issues, I decided to leave the machine up and running in Workbench with no activity to see how long it would take for it to crash on its own. At first it was happening within 5 or 10 minutes but it gradually seemed to go longer and longer until it stopped entirely. I wondered if perhaps Netsurge, who had given me this machine, hadn’t really used it beyond checking to make sure the Kickstart screen appeared, and that, maybe after what could be decades of not being used, some of its capacitors needed an extended “warm up”. Despite the capacitors in the Amiga 500s not being nearly as problematic as in some other models, at this age them being fully on their way to shuffling off this mortal coil was still a distinct possibility.
At that point I didn’t do anything noteworthy with the machine for a few weeks but upon my next longer session with it I immediately started to have stability issues again. This time they mostly seemed to present themselves when playing with the cables and connectors and/or moving the Amiga around, and mostly seemed to manifest themselves by way of lock ups and total power losses, resets, and odd video output behavior. Because of that correlation, I focused on the power supply once again and observed that even when things seemed to be working perfectly, rocking the supply connector ever so slightly would result in a power loss or a reset. Boys, I think we’ve got ourselves one or more broken solder joints! It’s not surprising that the some of those joints could have finally given out to the stress of 30+ years of pushing in and yanking out the Amiga’s beefy square DIN power connector, and it seems likely that inconsistent power on the rails could indeed result in all of my issues for the same reasons I outlined when talking about the minimum draw issues above, except now my symptoms coinciding with disk drive activity make even more sense. It’s also easy to imagine that the changes in stability I’d observed previously were actually just related to the port’s pins sitting just right in their joints between attempts, and the connector (indeed the whole machine) not being physically moved around too much.

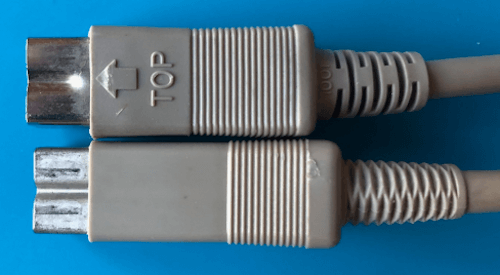
As a quick aside, my Meanwell power supply conversion is based on an original Commodore Amiga 500 312503-02 power supply. When I plug it in to the Amiga the power connector doesn’t seem to want to sit flush with the outside of the port, though with some additional effort it will go more or less in all the way. I later compared it directly to a slightly older 312503-01 revision Amiga 500 power supply and noted that the connector is actually quite different. The newer 02 model has a fatter housing, with an embossed arrow and the word “TOP” on the top which actually hits up against the Amiga 500’s case somewhat, a longer shield and longer pins, and the “V” shaped cut out on the top of the shield is less distinct and doesn’t extend its entire length. Most significantly, the thinner, shorter 01 connector plugs in fully so that the housing sits completely flush with the outside of the port with ease. It’s quite possible that me attempting to force the longer 02 connector “all the way” in (which, I now know is unnecessary) and then later struggling to yank it free is what damaged the port’s solder joints. 🙁
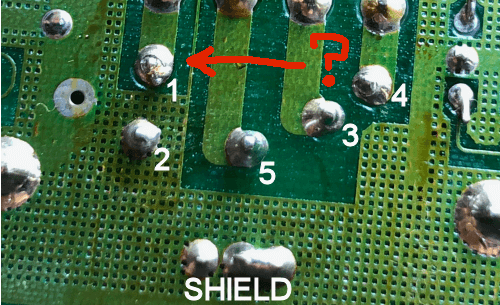
Opening my Amiga and disassembling it entirely for the first time, which involves unscrewing every single rear connector from the bottom shield so you can see the underside of the motherboard, I confirmed my suspicion. It was fairly difficult to see, but one of the DS-215 connector’s eight pins (pin 1, which is the all important +5V rail!) seemed to have a cracked or broken joint, or, perhaps by the looks of it, maybe even a cold solder joint from a past repair. In any case, it was visibly moving ever so slightly when the connector was wiggled. Time to break out the soldering iron!

Somehow, despite both a hobbyist and professional computer nerd for 20+ odd years, I’ve always completely sucked at soldering and would typically avoid it in all but the simplest tasks. Still, I figured that simply “reflowing” the existing solder on the broken joints with my busted old cheap soldering iron and perhaps some fresh solder wouldn’t be too far outside of my comfort zone. After talking to a few friends with some degree of expertise in electronics, I was convinced that a vastly superior fix would be to completely desolder the connector and start fresh to guarantee that I had reliable joints that would last me for many years to come, even with my abuse. Scary, but “challenge accepted” I suppose. I mean, this is the age where there are dozens of tutorials on YouTube for even the most obscure tasks, after all.
***Cue an intense training montage of me unboxing and setting up a bunch of brand new soldering equipment and supplies, and practicing soldering and desoldering a variety of small practice kits until my joints were impeccable and I could desolder an entire motherboard in mere minutes. Eye of the fucking tiger!***
While the first part isn’t such an exaggeration, I assure you that the results definitely are. Still, I worked on practicing and improving my soldering skills for a couple of weeks before it was time to put my beloved Amiga 500’s precious motherboard under the iron. As planned, I applied a bit of liquid flux to each joint and used my soldering iron to heat them, then used a spring loaded “solder sucker” and some desoldering wick to remove the solder from each pin entirely. The shield ground pin and the three shield pins gave me some trouble, since, as I now know, they lack thermal pads which causes the heat from a soldering iron to dissipate much more quickly, but the rest went well enough and in the end I was satisfied. I then soldered each pin with a nice new joint, including making sure to be a little generous with the three shield pins, since they seem to provide the most support to the connector port itself. Simple enough!
The outcome? Well, I’m pleased to say that it seems my stability issues are now resolved. While rocking the power connector doesn’t cause any power loss or restarts, at least when fully inserted, I also haven’t observed any stability issues since making the fix. I’ll know more the more I use it of course, but for now I’m happy with the repair.

Now, about the whole “learning AmigaOS” thing, I guess I have some reading to do…
—
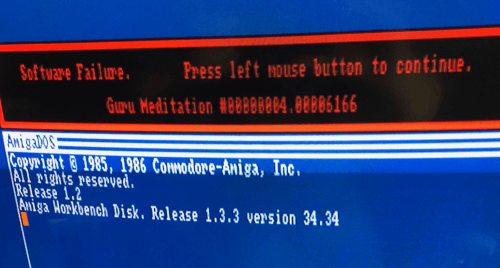
1. The infamous “guru meditation” error. This is actually the only one of these I saw during this ordeal, and probably not even related to my problem, but hey, it makes for a dramatic picture all the same!
2. A side by side comparison of the slightly different 312503-02 (top) and 312503-01 (bottom) power connectors.
3. The broken power connector solder joint on the bottom of my motherboard.
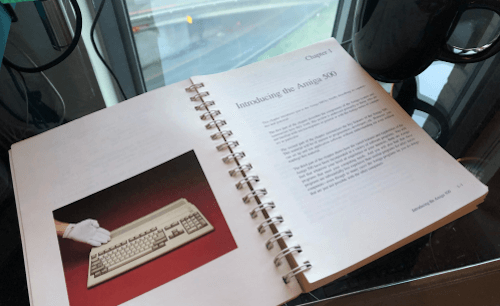
4. RTFM time? The original Amiga 500 user’s manual, chock full of basic AmigaOS tips and colorful pictures. Neat.